
Alignment and level are very important aspects to take into account when taking a photograph, since the quality of your image will depend on this. If you are an iOS user, this article is of interest to you, as we will teach you how to activate the level in the iPhone camera to help you have unforgettable photos.
By activating this feature you will notice the differences between your old photos and the new ones thanks to the level of your iPhone. Well will totally improve the quality of all your catches towards the horizon.
Do you want to have the best photos of landscapes and modern architecture for your blog or social networks? So, stay with us Until the end of this post to understand everything about this feature, you will love it!
What is the Level in the iPhone camera about?
It is a function that allows you to check if a surface is level or also if an object is in position vertical or horizontal. All this through the inclination sensor established in the device.
Therefore, when you open the camera on your iPhone you can make use of this function to achieve photographic or video compositions balanced and precise. In a nutshell, this option will help you take photos symmetrically, giving it a visually pleasing touch.

Please note that this feature is only available for mobile devices with a iOS version 17 or higher. It is totally optional but it will undoubtedly help you to obtain a much higher quality of photography, and also, you will be able to use it with the rear or front camera no matter what mode of your camera you are in.
- It may interest you: How to recover permanently deleted notes on iPhone 2024
Why use the level in my photos?
If you are interested in knowing a little more about this modality for your iPhone camera, you are in luck. Below we will name some of the benefits what does it have to make use of the level.
Among which we can find:
- Realism: If you are a lover of photographing landscapes, this option will come in handy because it is capable of obtaining totally realistic captures. This is thanks to which the horizon will not be tilted and will prevent the sky from suffering a distortion
- stable composition: Activating the level in the iPhone camera will make you enjoy very attractive images thanks to its composition. Well, this is capable of locating the key points of the object to obtain a more beautiful shot
- Save time: Previously, photos used to be edited to correct tilt or rotation errors. With this function you will completely forget about any type of edition, since you will obtain results directly
- Special for photographing architectures: If you prefer to take pictures of structures such as buildings or monuments, this feature will keep the vertical and horizontal lines static. Ensuring the symmetry of your images to make them look more elaborate
How to activate the camera level on my iPhone device?
Although it may seem difficult, this option is at a glance among the tools of your camera. But still, we want to help you by explaining how to activate the level in the camera of your iPhone in a detailed way.
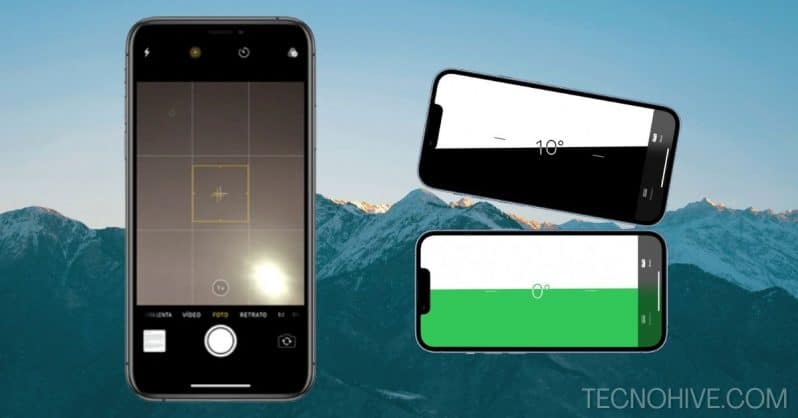
Enter your iPhone camera to start this process, access the level function by pressing the crosshair icon within a circle, which is at the top of the screen. Next, a series of lines will be shown that move depending on your movement.
In this way you can align the camera precisely together with the surface, architecture or any other element that you want to photograph. It's time for you to start taking screenshots like a pro.
Activate the Level in the iPhone camera (Step by step)
If you still haven't figured out how to use this tool on your iOS device's camera, don't worry, we know it might sound complicated. But the reality is that it is a very simple process, we leave you a series of steps to follow below:
- Enter your iPhone camera
- Choose the capture mode you want to use (Photo or video)
- Locate and click on the cross icon within a circle, this is the “Level”
- Once selected, the function will be activated and horizontal and vertical lines will appear on the screen
- Hold your iPhone in the position where you want to take a photo or record a video. You can help it stabilize by moving the mobile up, down or to the sides until the lines are level
- If you want to deactivate this function, simply press the “” icon again.Level”
Now there is no excuse to start taking pictures like never before, grab everyone's attention with your beautiful shots thanks to this feature.
Tips for Using Camera Level on Your iPhone
Despite being a fairly simple procedure, there are some points to take into account if you want to take a good photo. Next we leave you one series of tips To use the level option with your mobile camera:
- pay attention to color of the lines that appear on the screen, because when they are white, it means that the camera is unbalanced. On the other hand, the yellow color indicates that it is ready to take the photo
- Once the level is balanced, you can hold it by double tapping on the screen. So you can move freely without changing the position of the level, to modify it touch the screen again
- Swipe from one side to the other to hide and show the level of the screen temporarily and better see the landscape, architecture or object to be captured
- Use your camera grid: You can use the level and grid of your camera to get better details between the lines on the screen. This way you will further improve the quality of your photographs, taking very interesting references to see
- Try the level in different modes: Do not limit yourself to try this function only with the standard camera of your iPhone, you can also try it with other modes such as "Portrait", "Panorama" and even "Night" mode
Knowing this, it is a matter of being patient and trying different angles to achieve incredible results in your photographs. If you are consistent, you will notice instant improvements.
Applications to improve the level of your photographs
If you want to adjust and improve the level of your photos after you have taken them, you can use some applications. Which have tools straightening and correction of perspective to align your photos.
Some of these applications offer advanced functions for modify composition and achieve a symmetrical image. To help you, we are going to quickly teach you the most outstanding ones to carry out this task:
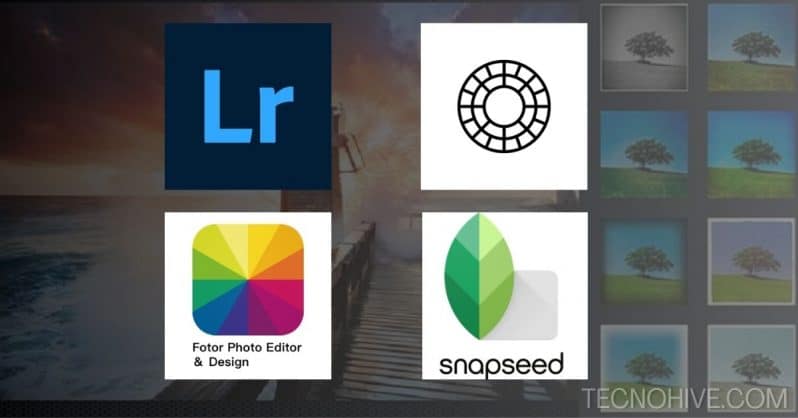
- Lightroom: Known for being an editing tool belonging to Adobe, it offers tools to correct the perspective and positioning of your photos. adjusting the level of your images and converging lines
- VSCO: Also well known in the editing market, this application allows you to calibrate the geometry of the image, straighten its lines, etc.
- photo: A fairly light application with basic tools to correct the perspective of your images. Special for those who want faster results
- snapseed: Offers functions to straighten, rotate and level your photos. It also has functions to correct distortions
Now that you know some of these applications, you just have to choose the one that best suits your needs. Well, the functions in each of them may vary, but in the end, you will get the same result.
- You may be interested in: Pages to Download free videos without Copyright in 2024
Conclusion
!! Congratulations!! Now you know everything you need to take pictures like a professional thanks to our guide to how to activate the level in the iPhone camera. We hope that the information shown has been to your liking, but above all, functional.
You can share with us your experience in the comment box or leave us your best photos using this function. Your opinion is of great importance to our entire team.
On the other hand, we invite you to continue browsing our web portal for more content related to the world of technology. Here you will find the best tutorials for mobile devices, games, etc.
Without more to add, we say goodbye!